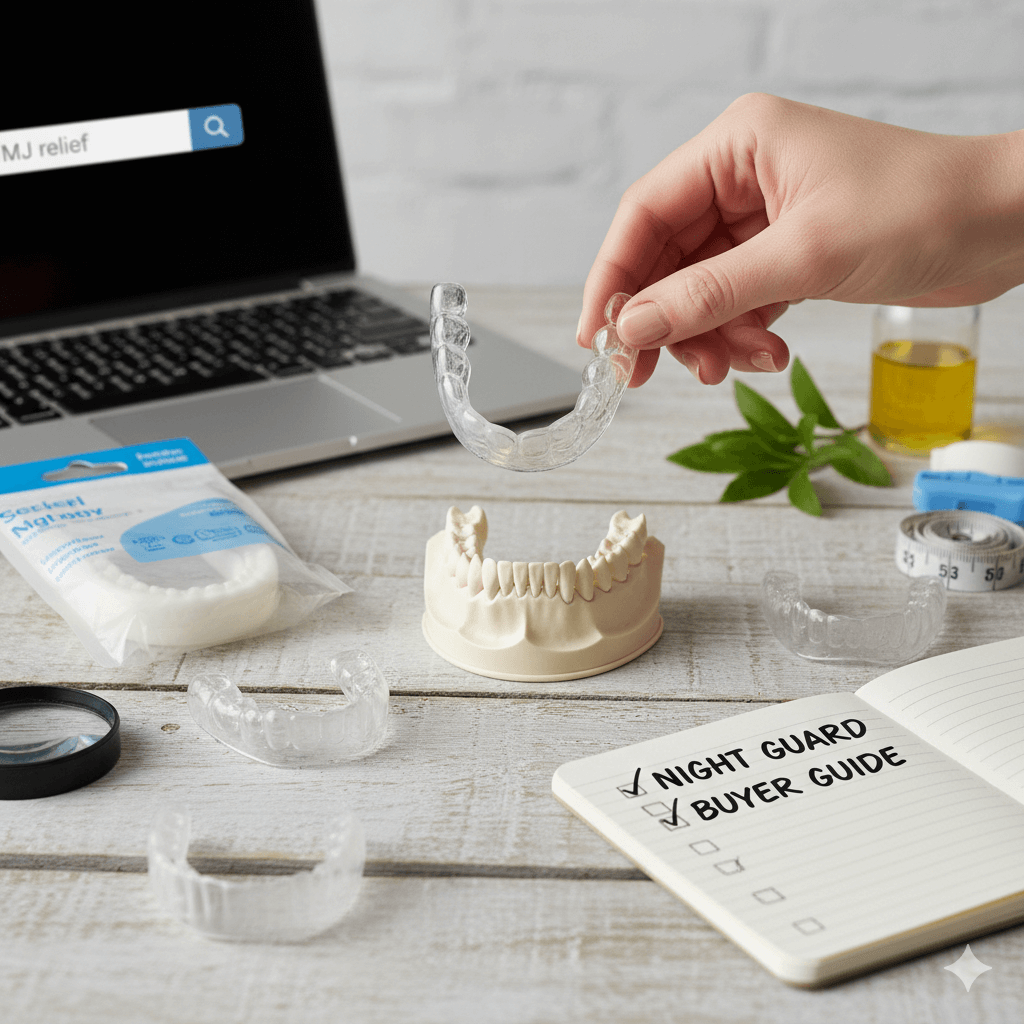
How to Choose the Right Night Guard for TMJ: A Comprehensive Buyer’s Guide
If you’re among the millions who grind or clench their teeth at night, a night guard might be your dentist’s first recommendation for TMJ protection. But with dozens of options ranging from $20 boil-and-bite kits to $500+ custom dental appliances, how do you know which type is right for your specific TMJ needs?
Choosing the wrong night guard can waste money, provide inadequate protection, or even worsen your symptoms. The “best” night guard isn’t the most expensive one—it’s the one that addresses your specific type of bruxism, fits your jaw anatomy comfortably, and provides the right level of protection without disrupting your sleep.
In this comprehensive guide, we’ll walk you through the night guard selection process step-by-step. From understanding different guard types to evaluating key features and knowing when professional fitting is essential, you’ll learn how to make an informed decision that protects both your teeth and your TMJ joints.
Section 1: Understanding Why Night Guards Help TMJ
The Primary Functions of a Night Guard:
1. Tooth Protection:
- Prevents wear: Stops enamel erosion from grinding
- Reduces fractures: Protects against cracked teeth and fillings
- Minimizes sensitivity: By protecting exposed dentin
- Preserves dental work: Crowns, bridges, and implants
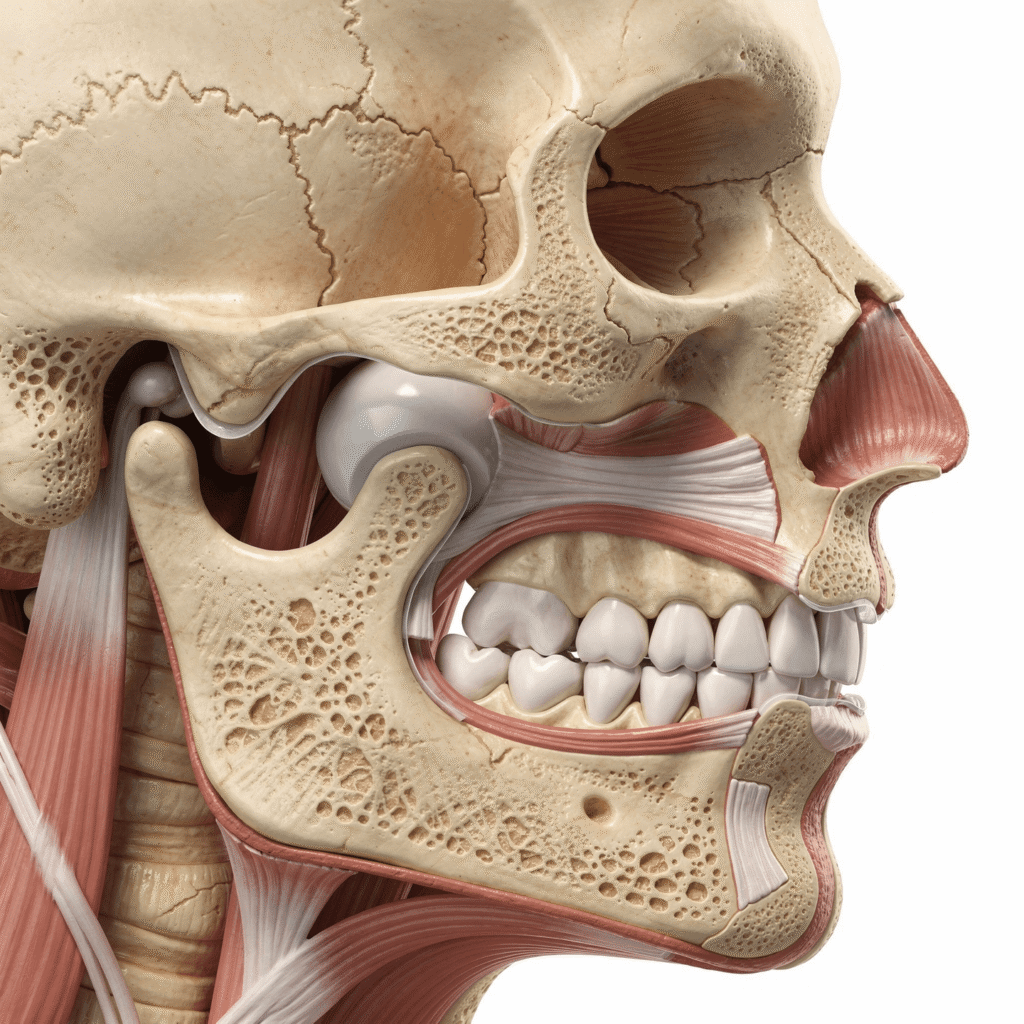
2. TMJ Joint Protection:
- Shock absorption: Cushions impact between upper and lower teeth
- Pressure distribution: Spreads forces across all teeth, not just certain spots
- Joint stabilization: Can help maintain proper jaw position
- Muscle relaxation: Some designs encourage jaw muscles to relax
3. Pain Reduction Mechanisms:
- Direct protection: Prevents teeth from pressing TMJ unevenly
- Muscle fatigue prevention: Reduces clenching intensity
- Neurological feedback: Presence in mouth can reduce grinding urge
- Sleep improvement: Less pain means better sleep quality
How Night Guards Differ from Splints:
Night Guards:
- Primary purpose: Protect teeth from grinding
- Wear time: Only during sleep
- Materials: Often softer, more flexible
- Cost: Generally less expensive
TMJ Splints/Oral Appliances:
- Primary purpose: Reposition jaw, treat TMJ disorder
- Wear time: May be 24/7 initially
- Materials: Often hard acrylic
- Cost: More expensive, usually custom-fitted
Important: Some devices serve both purposes, but understanding the primary goal helps in selection.
Effectiveness Statistics:
- Tooth protection: 85-95% effective with proper fit
- TMJ symptom reduction: 60-80% of users report improvement
- Bruxism reduction: 40-60% reduction in grinding force
- Long-term benefits: Prevents progressive TMJ damage
Section 2: Types of Night Guards: Custom vs. Over-the-Counter
1. Custom Dental Night Guards:
Made By: Dentist or dental lab
Process
- Dental impressions (physical or digital)
- Lab fabrication (1-2 weeks)
- Fitting appointment for adjustments
- Follow-up assessment
Advantages:
- Perfect fit: Matches your teeth exactly
- Optimal thickness: Customized to your grinding force
- Professional adjustment: Can be modified for comfort
- Durability: Often lasts 3-5 years with care
- Insurance: May be partially covered
Disadvantages:
- Cost: $300-$800+ without insurance
- Time: Requires appointments and waiting
- Adjustment period: May take 1-2 weeks to adapt
- Replacements: Expensive when needed
Best For:
- Severe bruxism
- Complex dental work (crowns, implants)
- TMJ disorder diagnosis
- Previous OTC guard failures
2. Boil-and-Bite Night Guards:
Made By: Yourself at home
Processo:
- Boil guard to soften
- Bite into softened material
- Cool to set shape
- Trim excess if needed
Advantages:
- Cost: $20-$100
- Immediate availability: No appointments needed
- Convenience: Can be replaced easily
- Travel-friendly: Inexpensive to replace if lost
Disadvantages:
- Fit limitations: Can’t match custom precision
- Material thickness: Often thinner, less protective
- Durability: Typically lasts 6-18 months
- Comfort issues: May cause gagging or sore spots
- Bite alteration: Can sometimes worsen TMJ if poorly fitted
Best For:
- Mild to moderate grinding
- Budget constraints
- Trying night guard for first time
- Temporary use while awaiting custom guard
3. Ready-Made/One-Size-Fits-All:
Made By: Manufacturer standard sizes
Process:
- Purchase predetermined size
- Insert as-is
- No molding or adjustment
Advantages:
- Lowest cost: $10-$50
- Immediate use: No preparation needed
- Disposable option: Some designed for single-use
Disadvantages:
- Poor fit: Rarely fits well
- Comfort issues: Often bulky or ill-fitting
- Effectiveness: Limited protection
- TMJ risk: Can worsen symptoms due to poor fit
Best For:
- Occasional grinding
- Travel backup
- Emergency temporary use
- Not recommended for regular TMJ protection
4. Hybrid/Mail-Order Custom Guards:
Made By: Online dental labs
Process:
- DIY impression kit sent to you
- You make impressions at home
- Mail to lab for fabrication
- Receive custom guard by mail
Advantages:
- Middle cost: $100-$300
- Custom fit: Better than boil-and-bite
- Convenience: No dental appointments
- Quality: Often similar to dentist-made
Disadvantages:
- DIY impressions: Risk of poor accuracy
- No professional fitting: No adjustments available
- Quality variation: Depends on specific company
- Insurance: Rarely covered
Best For:
- Moderate bruxism
- Those without dental insurance
- Good manual dexterity for impressions
- Intermediate option between OTC and dental
Section 3: Key Features to Look for in a TMJ Night Guard
1. Material Type:
Hard Acrylic:
- Pros: Maximum durability, best protection, maintains shape
- Cons: Longer adaptation, may feel bulky, harder adjustment
- Best for: Severe grinding, strong clenchers
Soft/Silicone:
- Pros: Comfortable immediately, flexible, less bulky
- Cons: Wears faster, may encourage chewing motion
- Best for: Mild grinding, comfort-focused users
Dual-Laminate/Hard-Soft Combination:
- Pros: Hard outer for protection, soft inner for comfort
- Cons: More expensive, thicker profile
- Best for: Most TMJ sufferers (best balance)
Material Comparison Table:
| Material | Durability | Protection | Comfort | Cost |
|---|---|---|---|---|
| Hard Acrylic | 5-10 years | Excellent | Fair (adapts) | $$$$ |
| Dual-Laminate | 3-7 years | Very Good | Good | $$$ |
| Soft Silicone | 6-18 months | Good | Excellent | $$ |
| Thermoplastic | 1-3 years | Good | Very Good | $$ |
2. Thickness:
Standard Measurements:
- Thin: 1-2 mm (soft guards)
- Medium: 2-3 mm (most common)
- Thick: 3-4+ mm (for severe grinding)
Thickness Guidelines:
- Mild grinding: 1.5-2.5 mm
- Moderate grinding: 2.5-3.5 mm
- Severe grinding: 3.5+ mm
- TMJ-specific: Often 2-3 mm with even distribution
Important: Thicker isn’t always better. Too thick can:
- Cause jaw strain
- Increase salivation
- Disrupt sleep
- Worsen TMJ symptoms
3. Coverage Type:
Full Arch (Upper or Lower):
- Covers: All teeth in one arch
- Pros: Maximum protection, stable
- Cons: Bulkier, more salivation
- Best for: Severe grinding, all teeth need protection
Partial/Front Only:
- Covers: Only front teeth
- Pros: Less bulky, less salivation
- Cons: Back teeth unprotected, may not prevent TMJ issues
- Best for: Front tooth wear primarily
Dual Arch (Both Upper and Lower):
- Pros: Balanced bite, often more comfortable
- Cons: Very bulky, expensive
- Best for: Specific TMJ repositioning needs (usually custom only)
4. Special TMJ Features:
Anterior Bite Plane:
- Only front teeth contact
- Allows back teeth to relax
- Can reduce muscle activity
- Best for: Muscle-related TMJ
Flat Plane vs. Anatomical:
- Flat plane: Smooth surface, allows jaw movement
- Anatomical: Has tooth imprints, more stable
- Choice depends: On whether jaw needs freedom or guidance
Canine Rise:
- Only canines contact during side movements
- Prevents other teeth from hitting
- Reduces grinding forces
- Advanced feature: Usually custom only
Anterior Opening:
- Creates space in front
- Prevents back teeth contact
- Can relieve TMJ pressure
- Specialized: For specific TMJ issues
Section 4: Step 1: Identify Your Bruxism Type
Grinding vs. Clenching:
Grinding (Bruxism):
- Motion: Side-to-side or circular
- Sound: Often audible grinding
- Damage: Flattened teeth, worn enamel
- TMJ impact: Shearing forces on joint
- Guard need: Thicker, durable material
Clenching:
- Motion: Static pressure, no movement
- Sound: Usually silent
- Damage: Cracked teeth, muscle hypertrophy
- TMJ impact: Constant compressive force
- Guard need: Shock-absorbing material
Mixed:
- Both grinding and clenching
- Most common pattern
- Requires balanced protection
- May benefit from dual-laminate
Self-Assessment Questions:
Morning Symptoms:
- Jaw soreness: More clenching
- Tooth sensitivity: More grinding
- Headache location: Temples (clenching), back of head (grinding)
- Cheek biting: Often with grinding
Partner Observations:
- Grinding sounds: Audible = grinding
- Jaw movement visible: Sideways = grinding
- Facial tension visible: Clenching often visible
Dental Evidence:
- Tooth wear patterns:
- Flat surfaces = grinding
- Cracked teeth = clenching
- Both = mixed
- Muscle development: Hypertrophied masseters = clenching
Intensity Assessment:
Mild:
- Occasional awareness
- Minimal tooth wear
- No jaw pain typically
- Guard type: Soft or medium OTC
Moderate:
- Regular symptoms
- Visible tooth wear
- Some jaw discomfort
- Guard type: Medium OTC or entry custom
Severe:
- Daily symptoms
- Significant tooth damage
- TMJ pain common
- Guard type: Custom hard or dual-laminate
Extreme:
- Multiple symptoms daily
- Dental damage progressing
- TMJ disorder diagnosed
- Guard type: Custom professional appliance
Section 5: Step 2: Assess Your Jaw Anatomy and Bite
Bite Type Considerations:
Overbite (Deep Bite):
- Upper teeth significantly overlap lower
- Guard challenge: May need thinner anterior section
- Risk: Front teeth take more pressure
- Solution: Guard with even thickness
Underbite:
- Lower teeth overlap upper
- Guard challenge: May need lower arch guard
- Risk: Different pressure distribution
- Solution: Often requires custom design
Crossbite:
- Some teeth inside, some outside
- Guard challenge: Complex fit needed
- Risk: Uneven wear patterns
- Solution: Almost always requires custom
Open Bite:
- Teeth don’t meet when biting
- Guard challenge: May not stay in place
- Risk: Limited options
- Solution: Professional consultation essential
Jaw Alignment Factors:
TMJ Status:
- Healthy joint: More guard options
- Inflamed joint: May need specific design
- Disc displacement: Requires specialized appliance
- Arthritis: Often needs softer material
Range of Motion:
- Normal: Standard guards usually fine
- Limited: May need thinner guard
- Hypermobile: May need stabilization features
- Asymmetric: Often requires custom design
Dental Work Considerations:
Existing Work:
- Crowns/bridges: Need guard that protects without damaging
- Implants: Special consideration for forces
- Veneers: Softer guard often recommended
- Fillings: Standard protection usually adequate
Missing Teeth:
- Space present: Guard may need to span gap
- Multiple missing: Custom almost always needed
- Dentures: Different considerations entirely
- Partial dentures: Guard compatibility important
Palate Shape Assessment:
High Palate:
- More room for guard
- Less gag reflex risk
- Options: Most guard types work
Low/Flat Palate:
- Less room for guard
- Higher gag reflex risk
- Options: Thinner profiles, smaller guards
Narrow Palate:
- Limited space
- Options: May need narrower design
- Challenge: Finding comfortable fit
Section 6: Step 3: Consider Your Sleep Habits
Sleep Position Impact:
Back Sleepers:
- Advantage: Guard stays in position well
- Challenge: May experience more salivation
- Guard choice: Most types work well
- Thickness: Can often tolerate thicker guards
Side Sleepers:
- Challenge: Pressure on one side
- Risk: Guard may shift or cause discomfort
- Guard choice: Need secure fit, even thickness
- Material: May prefer softer for comfort
Stomach Sleepers:
- Challenge: Face pressure on guard
- Risk: Discomfort, jaw misalignment
- Guard choice: Thin profile essential
- Material: Soft often better tolerated
Combination Sleepers:
- Need: Versatile guard that works in all positions
- Challenge: Must stay secure during movement
- Solution: Well-fitting custom often best
- Alternative: Adjustable OTC with good retention
Breathing Patterns:
Nasal Breathers:
- Advantage: No mouth breathing issues
- Guard choice: Most types suitable
- Consideration: Still ensure breathing not restricted
Mouth Breathers:
- Challenge: Guard may feel restrictive
- Risk: Increased salivation, discomfort
- Guard choice: Lower profile, anterior opening designs
- Important: Address breathing issue separately if possible
Sleep Apnea/Snoring:
- Critical: Some guards can worsen airway issues
- Solution: Consult sleep specialist
- Option: Special oral appliances for both issues
- Never use: Standard guard without apnea evaluation
Salivation Level:
High Salivation:
- Challenge: Guard may feel uncomfortable
- Solution: Lower profile, fewer ridges
- Material: Hard surfaces easier to clean
- Adaptation: May take longer (1-3 weeks)
Low Salivation/Dry Mouth:
- Challenge: Guard may stick or irritate
- Solution: Softer materials, hydrating gel
- Important: Address dry mouth cause if medical
Sleep Movement:
Restless Sleeper:
- Need: Secure retention
- Risk: Guard may dislodge
- Solution: Custom fit, possible added retention features
- Alternative: Two-piece design if custom
Still Sleeper:
- Advantage: Guard stays positioned
- Options: Wider range of guards suitable
- Consideration: Still ensure easy removal if needed
Section 7: Step 4: Evaluate Material and Durability
Durability Expectations:
Custom Hard Acrylic:
- Lifespan: 5-10 years with care
- Wear pattern: Minimal if properly made
- Maintenance: Regular cleaning, occasional polishing
- Replacement signs: Visible wear, poor fit, damage
Dual-Laminate:
- Lifespan: 3-7 years
- Wear pattern: Soft layer may compress over time
- Maintenance: Gentle cleaning, avoid harsh chemicals
- Replacement: When soft layer becomes thin or uncomfortable
Soft/Silicone OTC:
- Lifespan: 6-18 months
- Wear pattern: Can develop holes, tears
- Maintenance: Regular cleaning, air drying
- Replacement: Every 6-12 months or when damaged
Boil-and-Bite:
- Lifespan: 1-3 years with care
- Wear pattern: Material breakdown, shape loss
- Maintenance: Careful cleaning, proper storage
- Replacement: When fit deteriorates or material degrades
Material Safety Considerations:
BPA-Free:
- Importance: Especially for long-term wear
- Materials to prefer: Medical-grade silicone, dental acrylic
- Materials to avoid: Cheap plastics of unknown origin
- Certification: Look for FDA-cleared materials
Hypoallergenic:
- Critical if: You have latex or other allergies
- Materials: Medical-grade silicone, acrylic usually safe
- Testing: Patch test if concerned
- Symptoms: Discontinue if irritation occurs
Taste/Odor:
- Issue: Some materials have chemical taste
- Solution: Look for taste-free options
- Preparation: May need soaking before first use
- Adaptation: Usually fades within few nights
Cleaning and Maintenance Requirements:
Daily Cleaning:
- All guards: Brush with toothbrush and mild soap
- Avoid: Toothpaste (abrasive), hot water (warps)
- Storage: Dry, ventilated case
- Never: Leave wet in sealed container
Weekly/Monthly:
- Deep clean: Denture cleaner tablets
- Disinfection: As recommended by manufacturer
- Inspection: Check for wear, damage, fit changes
Professional Care (Custom):
- Dental visits: Bring to regular checkups
- Professional cleaning: Occasionally needed
- Adjustments: If discomfort or fit issues
Warranty and Replacement Policies:
Custom Dental Guards:
- Warranty: Often 1-2 years against defects
- Adjustments: Usually included initially
- Repairs: Sometimes possible
- Replacements: At full cost typically
OTC Guards:
- Warranty: Varies widely (30 days to 1 year)
- Replacements: Some offer if damaged quickly
- Customer service: Research company reputation
- Return policy: Important to check before purchase
Section 8: Step 5: Balance Protection with Comfort
The Comfort-Protection Spectrum:
Maximum Protection (Least Comfort):
- Features: Thick, hard material, full coverage
- Best for: Extreme grinding, dental emergency
- Trade-off: Longer adaptation, possible discomfort
- Example: 4mm hard acrylic full arch guard
Balanced Approach:
- Features: Medium thickness, dual-layer, good coverage
- Best for: Most TMJ sufferers
- Trade-off: Some adaptation needed, good protection
- Example: 2.5mm dual-laminate custom guard
Maximum Comfort (Less Protection):
- Features: Thin, soft material, partial coverage
- Best for: Mild symptoms, comfort priority
- Trade-off: Less durability, limited protection
- Example: 1.5mm soft silicone front-only guard
Adaptation Period Realities:
First Week:
- Common: Increased salivation, gag reflex, speech changes
- Normal: Slight discomfort, feeling of fullness
- Management: Wear during daytime initially, remove if pain
- Goal: Build tolerance gradually
Weeks 2-3:
- Improvement: Most side effects diminish
- Adjustment: May need minor trimming (OTC) or dental adjustment (custom)
- Assessment: Evaluate comfort and effectiveness
- Decision: Continue or try different type
Month 1+:
- Adapted: Should feel natural
- Effectiveness: Symptoms should improve
- If not: Re-evaluate guard choice with professional
Comfort Red Flags vs. Normal Adjustment:
Normal (Temporary):
- Slight pressure sensation
- Increased salivation first few nights
- Awareness of guard presence
- Minor speech changes initially
Red Flags (Address Immediately):
- Sharp pain when biting down
- Jaw locking or limited opening
- Sores or ulcers from guard
- Significant morning pain increase
- Teeth feeling loose or different
Comfort Optimization Tips:
For Custom Guards:
- Initial adjustments: Schedule with dentist
- Pressure points: Mark with articulating paper
- Gradual wear: Increase time each night
- Communication: Tell dentist all concerns
For OTC Guards:
- Proper molding: Follow instructions exactly
- Trimming: Only if recommended, carefully
- Smooth edges: Use emery board if rough
- Trial period: Use manufacturer’s if available
For All Guards:
- Evening routine: Insert 30+ minutes before sleep
- Relaxation: Jaw exercises before inserting
- Moisture: Sip water if dry mouth
- Position: Ensure seated properly before sleeping
Section 9: Professional Consultation: When It’s Essential
Mandatory Dental Visit Scenarios:
1. Before Any Guard Use If:
- TMJ disorder diagnosed
- Severe grinding/clenching
- Significant dental work (crowns, implants, veneers)
- Jaw pain beyond mild discomfort
- Limited jaw movement
- Previous guard problems
2. For Custom Guard Consideration:
- OTC guards failed after proper trial
- Complex bite issues (crossbite, open bite, underbite)
- Multiple missing teeth
- Severe tooth wear already present
- Insurance coverage available
3. For Specialized Appliances:
- TMJ repositioning needed
- Sleep apnea coexists
- Specific jaw alignment goals
- Multidisciplinary treatment plan
What to Expect at Dental Consultation:
Evaluation Components:
- Medical/dental history: Previous treatments, symptoms
- Oral examination: Teeth, gums, jaw joints
- Bite analysis: How teeth come together
- Jaw function assessment: Range, sounds, pain
- Imaging possible: X-rays, CT scan if needed
- Discussion: Options, costs, expectations
Questions to Ask Your Dentist:
- What type of guard is best for my specific situation?
- What material and thickness do you recommend?
- How long should adaptation take?
- What follow-up appointments are needed?
- What warranty or adjustment period is included?
- How do I clean and maintain it properly?
- What signs indicate I need an adjustment or replacement?
- Is this covered by my insurance? What are out-of-pocket costs?
Insurance Considerations:
Common Coverage:
- Custom guards: Often 50-80% covered if medically necessary
- OTC guards: Rarely covered
- Documentation needed: Proof of bruxism/TMJ diagnosis
- Pre-authorization: Often required
Maximizing Coverage:
- Get diagnosis: From dentist, not self-diagnosis
- Medical necessity: Emphasize pain or damage prevention
- Pre-treatment estimate: Submit to insurance first
- Appeal if denied: With additional documentation
- Flexible spending: Use FSA/HSA funds if available
When to Get a Second Opinion:
Consider if:
- Dentist recommends very expensive option without clear justification
- You feel rushed or not listened to
- Recommendations seem inconsistent with research
- Multiple treatment options not discussed
- You have doubts about diagnosis or plan
How to:
- Request records from first dentist
- Seek specialist if needed (prosthodontist, TMJ specialist)
- Compare recommendations objectively
- Consider both clinical expertise and cost
Section 10: Night Guard Care and Maintenance
Daily Cleaning Routine:
Morning Removal and Cleaning:
- Remove gently: Don’t pull hard if stuck
- Rinse immediately: With cool water
- Brush gently: Soft toothbrush with mild soap or denture cleaner
- Rinse thoroughly: All cleaner residue
- Air dry: On clean towel, not in closed container
- Store: In ventilated case when completely dry
What to Avoid:
- Toothpaste: Abrasive damages material
- Hot water: Warps plastic, especially OTC
- Bleach/strong chemicals: Degrades materials
- Dishwasher: Too hot, too harsh
- Towel drying: Can introduce lint, doesn’t dry thoroughly
Weekly Deep Cleaning:
For All Guards:
- Soak: In denture cleaner solution (follow product instructions)
- Brush again: After soaking to remove loosened debris
- Inspect: Check for wear, cracks, or damage
- Disinfect: If recommended by manufacturer
Special Considerations:
- Soft guards: May need special soft-material cleaner
- Custom guards: Can often use same as dentures
- Travel: Pack cleaning supplies, never store dirty
Storage Best Practices:
Home Storage:
- Container: Ventilated, hard-sided case
- Location: Bedside table, bathroom (if dry)
- Avoid: Direct sunlight, heat sources
- Never: Wrap in tissue (gets thrown away)
Travel Storage:
- Portable case: Always use when traveling
- Identification: Put name/number inside case
- Backup: Consider second guard for trips
- Cleaning on road: Pack small brush and soap
Troubleshooting Common Issues:
Discoloration:
- Cause: Coffee, tea, tobacco stains
- Prevention: Clean immediately after removing
- Removal: Special cleaner or professional polishing
- Note: Some staining normal over time
Odors:
- Cause: Bacteria buildup, improper drying
- Prevention: Thorough cleaning and drying
- Removal: Baking soda paste, denture cleaner
- Persistent: May indicate need for replacement
Rough Spots:
- Cause: Normal wear, improper cleaning
- Smoothing: Dental visit for custom, emery board for OTC (carefully)
- Prevention: Avoid abrasive cleaners
- Warning: Sharp edges need immediate attention
Fit Changes:
- Possible causes: Weight changes, dental work, material warping
- Custom guards: May need adjustment by dentist
- OTC guards: May need replacement
- Never: Try to adjust custom guard yourself
Replacement Schedule Guidelines:
Custom Guards:
- Expected lifespan: 3-10 years depending on material
- Replace when: Visible wear, poor fit, damage, symptoms return
- Regular check: Bring to dental appointments for assessment
OTC Guards:
- Expected lifespan: 6 months-3 years
- Replace when: Holes develop, material stiffens, fit deteriorates
- Regular check: Monthly self-inspection
Signs You Need Replacement:
- Visible cracks, holes, or wear
- Loose fit that affects retention
- Persistent odors despite cleaning
- Discomfort that doesn’t resolve
- Return of grinding symptoms
- Dental changes (new work, tooth loss)
Section 11: Common Night Guard Mistakes to Avoid
Mistake 1: Choosing Based Only on Price
The Problem:
- Assuming expensive = best or cheap = worthless
- Not considering value over time
Better Approach:
- Calculate cost per night of use
- Consider: Custom $500/5 years = $0.27 per night
- Consider: OTC $50/1 year = $0.14 per night but may be less effective
- Factor in dental damage repair costs if guard fails
Mistake 2: Improper DIY Adjustments
The Problem:
- Trimming custom guards yourself
- Using tools not designed for dental materials
- Creating sharp edges or uneven surfaces
Better Approach:
- Custom guards: Always return to dentist for adjustments
- OTC guards: Only trim if instructions specify, use proper tools
- Smooth any edges with fine emery board dipped in water
Mistake 3: Inadequate Cleaning
The Problem:
- Quick rinse only
- Using toothpaste (abrasive)
- Storing wet
- Not cleaning case regularly
Better Approach:
- Establish consistent cleaning routine
- Use products designed for dental appliances
- Air dry completely before storing
- Clean case weekly with soap and water
Mistake 4: Expecting Immediate Perfection
The Problem:
- Giving up after one uncomfortable night
- Not allowing adaptation period
- Expecting 100% symptom elimination immediately
Better Approach:
- Commit to 2-3 week trial period
- Wear during daytime initially to adapt
- Expect gradual improvement, not instant cure
- Communicate with provider about adjustment needs
Mistake 5: Using Wrong Guard for Problem
The Problem:
- Using tooth protection guard for TMJ repositioning
- Using soft guard for severe grinding
- Using OTC when custom is medically needed
Better Approach:
- Understand guard’s primary purpose
- Match guard type to symptom severity
- Consult professional for proper diagnosis
- Be willing to upgrade if initial choice inadequate
Mistake 6: Neglecting Underlying Causes
The Problem:
- Treating guard as complete solution
- Ignoring stress, sleep issues, or bite problems
- Not addressing contributing lifestyle factors
Better Approach:
- View guard as part of comprehensive management
- Address stress, sleep hygiene, posture
- Consider multidisciplinary approach if needed
- Regular dental follow-ups to monitor progress
Mistake 7: Poor Travel Habits
The Problem:
- Forgetting guard when traveling
- Improper travel storage
- Using hotel towels for cleaning/drying
- Not having backup plan
Better Approach:
- Pack guard in carry-on, not checked luggage
- Bring complete cleaning supplies
- Use portable hard case
- Consider inexpensive backup for trips
Mistake 8: Not Monitoring Effectiveness
The Problem:
- Assuming it’s working without tracking
- Not noticing gradual symptom changes
- Continuing use despite problems
Better Approach:
- Keep simple symptom diary
- Note morning jaw comfort, headache frequency
- Take “before” photos of teeth if possible
- Regular dental check-ins for objective assessment
Section 12: Frequently Asked Questions
Q1: Can a night guard actually worsen TMJ symptoms?
A: Yes, if poorly fitted or wrong type. A guard that doesn’t allow proper jaw alignment or creates uneven pressure can increase pain. This is why professional consultation is important for TMJ sufferers.
Q2: How long does it take to get used to wearing a night guard?
A: Most people adapt within 1-3 weeks. Start with daytime wear, gradually increasing nighttime use. Severe discomfort beyond 3 weeks may indicate need for adjustment or different type.
Q3: Will a night guard stop me from grinding completely?
A: Usually not completely, but significantly reduces intensity and protects teeth. Some people grind less with a guard, but the primary purpose is protection, not necessarily behavior elimination.
Q4: Can I use a sports mouthguard instead of a night guard?
A: Not recommended. Sports guards are designed for impact protection, not grinding. They’re often bulkier and can encourage chewing motion, potentially worsening TMJ issues.
Q5: How do I know if my night guard fits properly?
A: It should stay in place without biting pressure, cover all grinding surfaces evenly, not cause pain or sores, and allow your jaw to rest in comfortable position. Custom guards should feel secure but not tight.
Q6: Are there alternatives to night guards for TMJ?
A: Yes, including: stress management, physical therapy, bite adjustment, medications, and in some cases, surgery. Night guards are often first-line treatment but not only option.
Q7: Can I make my own night guard at home?
A: Boil-and-bite kits are essentially DIY, but true custom guards require professional impression and fabrication. Serious TMJ issues should have professional oversight.
Q8: How often should I replace my night guard?
A: Custom: 3-10 years depending on material and wear. OTC: 6 months-3 years. Replace sooner if damaged, poorly fitting, or symptoms return.
Q9: Will insurance cover a night guard for TMJ?
A: Often yes, if medically necessary. Typically covers 50-80% of custom guard. OTC guards rarely covered. Pre-authorization usually required.
Q10: What should I do if I gag with my night guard?
A: Try wearing during daytime to adapt, ensure it’s not overextended in back, consider thinner or shorter design. If persistent, consult dentist for adjustment or different design.
Choosing the right night guard for TMJ involves more than picking the most expensive option or the one with the best marketing. It requires understanding your specific type of bruxism, considering your jaw anatomy and bite, and balancing protection with comfort. Whether you opt for a professionally fitted custom guard or start with a quality over-the-counter option, the key is informed selection followed by proper use and maintenance.
Remember that a night guard is often just one component of comprehensive TMJ management. While it can provide significant symptom relief and prevent dental damage, addressing underlying factors like stress, sleep quality, and posture will enhance your results. Regular dental check-ups ensure your guard continues to serve its purpose effectively as your needs may change over time.
With careful selection and proper care, a night guard can be a valuable tool in managing TMJ symptoms and protecting your oral health for years to come.